During internal assessments in Windows environments, we use BloodHound more and more to gather a comprehensive view of the permissions granted to the different Active Directory objects. If you haven’t heard of it already, you can read article we wrote last year: Finding Active Directory attack paths using BloodHound.
In this post, we’ll show an advanced usage of this tool by using our additional queries. We encourage you to build your own, in order to tailor them to your needs.
Use queries in BloodHound
In the context of internal assessments, we wrote new queries for BloodHound in order to extend its features. We decided to publish them to help everyone assess their environment and to possibly foster further improvements.
You can edit the “Custom Queries” from the BloodHound GUI, copy our queries from here, paste them and reload. This will give you access to a bunch of new queries as described here.

For instance, these new queries will allow you to assess environments with LAPS enabled by aiming for computers without LAPS, to find computers that can be misused to get administrative access to other computers or even to look for user accounts with their password readable in the Active Directory.
Example: Computer that are Local or Domain Admins
A lesser known attack path discussed in this Twitter thread is by using the permissions of computer accounts that are members of Domain Admins or local administrators to another computer. We wrote the following queries for finding such computers:
- All Computers in Domain Admins
- All Computers Local Admin to Another Computer

Using the so-called PrinterBug, it is possible to trigger an SMB connection from a domain-joined computer with the print spooler service active using any domain account.
The attacker can trigger such a connection to his computer and relay it to the victim to gain administrative privileges.
Here are the requirements of such an attack:
- Computer admin to another computer (discovered thanks to this BloodHound query!)
- Valid domain account
- Print spooler service active on the source computer, or another way of triggering an outgoing SMB connection
- No SMB signing on the target computer
- No firewall blocking SMB from the source computer to the attacker
- No firewall blocking SMB from the attacker to the target computer
Use queries in Neo4j Browser
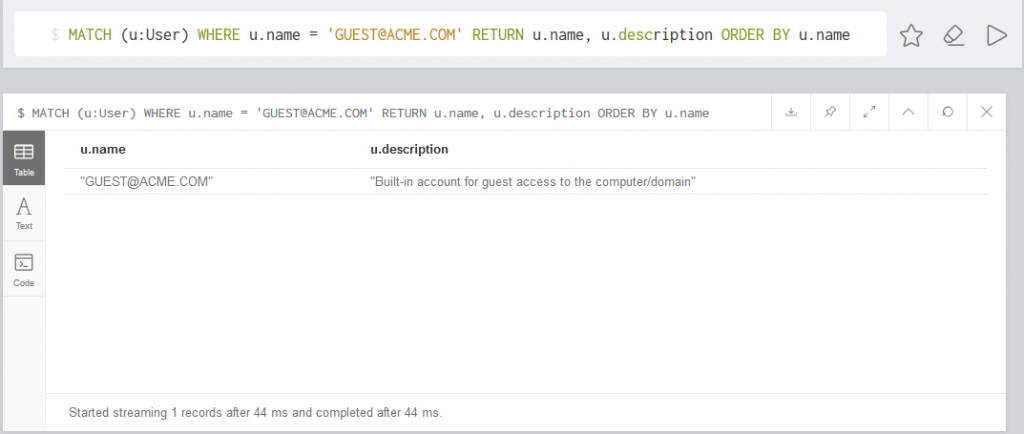
In order to extract data from BloodHound, the underlying database can be queried directly by using the Neo4j Browser (by default at http://localhost:7474). There, you can get the result of a query in a textual or tabular form. You’ll find the queries we use here.

Our queries will allow you to do some statistics over LAPS usage or to search for local administrators that were added manually on the computers and not by GPO.
If the number of returned entries is above 1’000, you’ll have to export the results in CSV to have access to all of them.
Build your own queries
BloodHound is based on a Neo4j database, which can be queried with a language named Cypher.
Cypher queries
Cypher queries are made of nodes (User, Group, Computer…), relationships (MemberOf, AdminTo…) and properties (name, description…).
The nodes are symbolized by () and the relationships by []. For instance, users are symbolized by (:User) and the “member of” relationship by [:MemberOf]. Variables can be assigned for further use: (variable:User) for example.
Queries allow to display nodes:
# Return all the users
MATCH (u:User) RETURN u

# Return the users with the name containing "ADMIN"
MATCH (u:User) WHERE u.name =~ ".*ADMIN.*" RETURN u.name
Queries can also return paths:
# Return all the users and the computer they are admin to
MATCH p = (u:User)-[:AdminTo]->(c:Computer) RETURN p

# Return the  users with the name containing "ADMIN" and the computer they are admin to
MATCH p = (u:User)-[:AdminTo]->(c:Computer) WHERE u.name =~ ".*ADMIN.*" RETURN p
The references listed below contain additional resources regarding Cypher queries.
Display Cypher queries
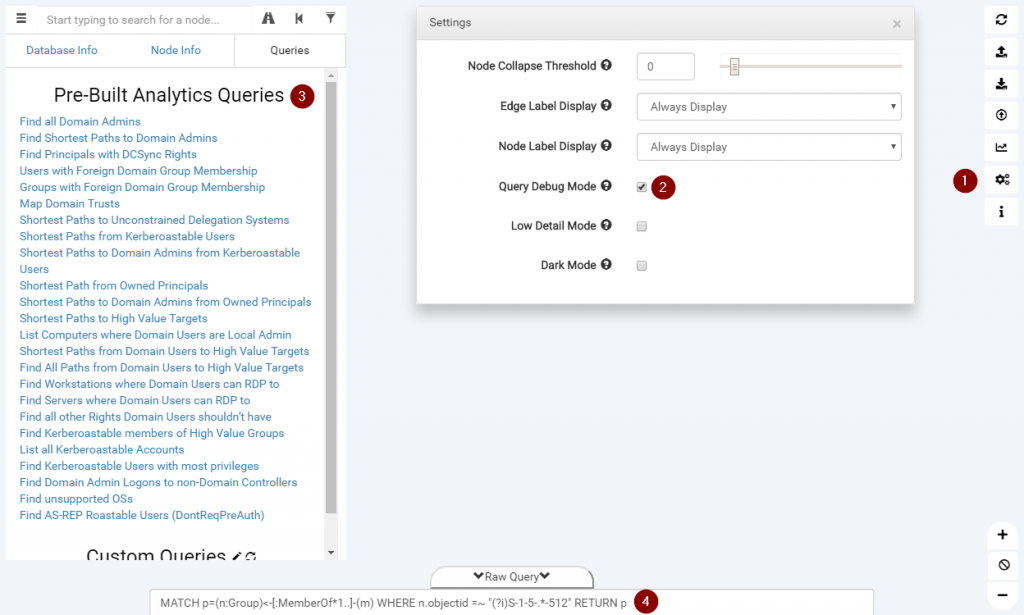
When starting to write queries, it is easier to start with existing ones. BloodHound has a nice feature allowing to display the last query executed. To do so, open the options and activate the “Query Debug Mode”. Afterwards, you’ll see the queries used in “Raw Query”.
You can also use the “Raw Query” field to execute your own queries.

Display node attributes
In order to see the attributes for a node, you can right-click on it, edit it and you’ll get a raw list of the attributes. These can be used in queries. You can even modify them directly from the GUI.

BloodHoundLoader
We often find ourselves wanting to set the values of attributes in BloodHound in bulk. The BloodHoundLoader tool was written for this purpose. It allows marking a list of computers as owned or a list of users as high value for instance.
We use this feature for example to mark a list of accounts with their password found on a share as owned, or following a discussion with a customer to set a list of especially interesting targets as high value.
The following command sets all the hosts in “high_value.txt” to high value targets:
python BloodHoundLoader.py --dburi bolt://localhost:7687 --dbuser neo4j --dbpassword BloodHound --mode h high_value.txt
The names of users and computers in the text file should match the name shown on the GUI for the node:
DC.ACME.COM
COMPUTER.ACME.COM
[email protected]
Conclusion
Assessment after assessment, we see that BloodHound is an exceptional tool that can be further extended to match our needs. The only limit is the imagination of the person assessing the Active Directory environment.
It is possible to write additional queries to picture new attack paths, to query the database directly and extract data or to load data in bulk. You can adapt the queries or the loader to match the environment you’re in and to target exactly what you want.
References
Our GitHub repository on BloodHound:
BloodHound pre-built queries:
Introduction to Cypher query language:
Cypher cheat sheet:
Cypher queries collection:
Leave a Reply