
Nowadays more and more security tools are used to monitor and generate alerts from different sources (EDR, Proxy, etc.).
These alerts often contains URL, domain names, or file hashes that can and should be compared with a threat intelligence source to immediately identify current threats and avoid when possible false positives.
In this article, we will show how to import the IoCs (Indicators of Compromise) available on the great threatfox.abuse.ch into Azure Sentinel by creating a Logic App and how to link together alerts with the available indicators.
Note that we will not cover every aspect of the configuration. Some Azure know-how (Logic Apps, Permissions, Sentinel, Log Analytics Workspace) is required to understand the content of this article.
TL;DR: You can download the template for the Logic App on GitHub: https://github.com/CompassSecurity/ThreatFoxImporter.
Creation of the Logic App
Basic Settings
Before creating and importing the indicators some preparation work on your Azure infrastructure has to be done.
Specifically, we will create a Logic App that will periodically fetch the IoCs and store them into the threat intelligence database available in the Log Analytics workspace associated with your Sentinel installation.
To create the application:
- login with your account (you may need extra permissions)
- go straight to the Logic App portal
- click “Add” in the top left corner
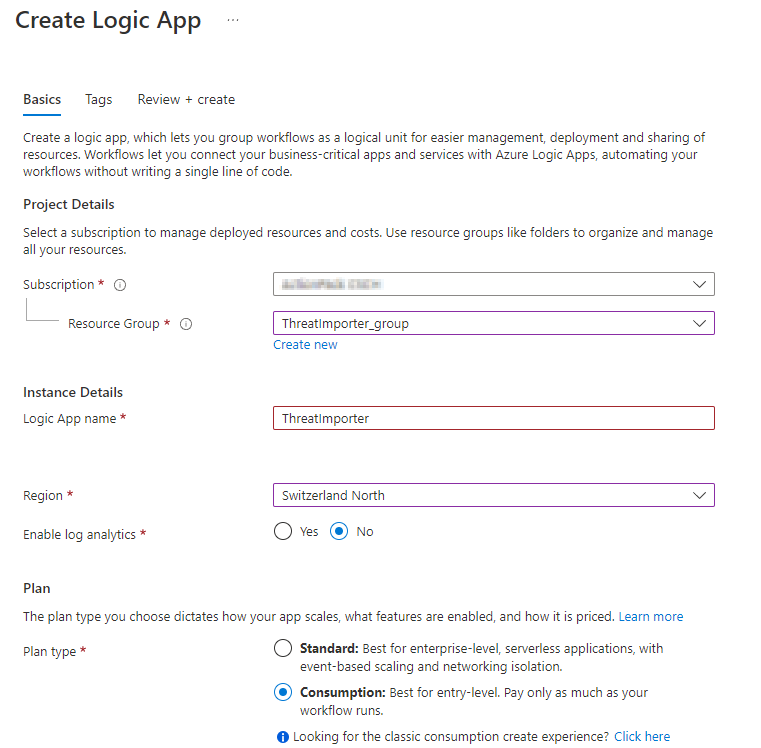
- give the Logic App a name
- select the region
- be sure to select “Consumption”
Managed Identity
Logic Apps can run under managed identities. This is an important step regarding its security, because a managed identity is restricted and tied to only a specific resource. It does not have extra permissions to access other objects in Azure. Additionally with a managed identity you do not need to provide any credentials in the code.
We create one for our app by selecting “Identity” in the left menu and setting the “Status” to “On”:
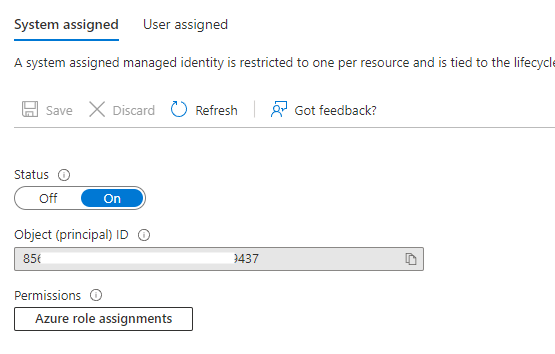
Azure will create a new identity with the displayed principal ID. With every managed identity, a new “service principal” is created.
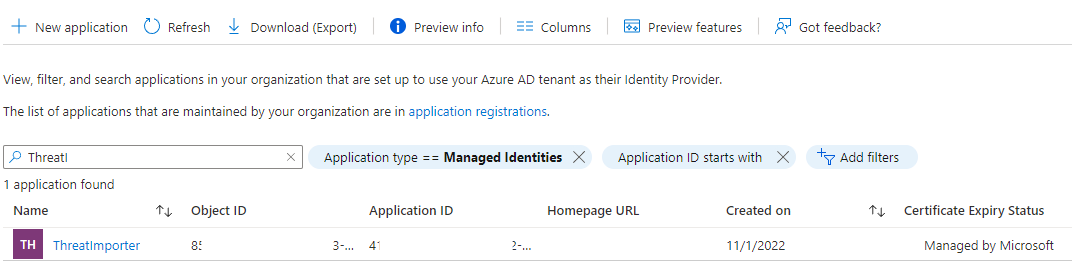
The managed identity “ThreatImporter” has been created, this will be our “interface” with the Graph API. This identity will be responsible for the creation of the IoC in the relative Log Analytics workspace and thus we need to assign it the correct permissions.
Permissions
In the case of threat intelligence we only need to assign the ThreatIndicators.ReadWrite.OwnedBy permissions. Now there is one little pitfall when working with managed identities: we cannot via the graphical interface assign permissions like the one above.
For this purpose we need a PowerShell script that we will use to assign the permissions via the Graph API (the script can be downloaded from https://raw.githubusercontent.com/thenikk/oceanleaf/main/Assign%20permissions%20to%20Managed%20Identity/assign-permissions-to-managed-identity.ps1):
#Author: Niklas Tinner, 25.09.2022

###############
## Variables ##
###############

#Specify the Managed Identity. You can find it in the Azure resource instance under Managed Identity, or in the Enterprise Applications, when filtering for "Managed Identity"
$ObjectPrincipalID = "<Insert the Object (principal ID) of your Managed Identity>"
#Specify the app, where the access should be granted for. Microsoft Graph ID is the same in all tenants = "00000003-0000-0000-c000-000000000000"
$appId = "00000003-0000-0000-c000-000000000000"
#Specify the API permissions
$permissions = "<Insert permission name>", "<Insert next permission name>" #Example: "Directory.Read.All", "Device.Read.All" find all at: https://learn.microsoft.com/en-us/graph/permissions-reference

###############
## Execution ##
###############

#Make sure, the module AzureAD is installed (Install-Module AzureAD) and connect to AzureAD. Authenticate with an account that has Application Administrator role assigned.
Connect-AzureAD

#Find the application in AzureAD through the previously specified $appId
$app = Get-AzureADServicePrincipal -Filter "AppId eq '$appId'"

#Assign all permissions to the Managed Identity service principal
foreach ($permission in $permissions)
{
   $role = $app.AppRoles | where Value -Like $permission | Select-Object -First 1
   New-AzureADServiceAppRoleAssignment -Id $role.Id -ObjectId $ObjectPrincipalID -PrincipalId $ObjectPrincipalID -ResourceId $app.ObjectId
}

###############
## Reference ##
###############
#Find more information in the corresponding blog post: https://oceanleaf.ch/azure-managed-identity/
This script needs the Object Principal ID and the permission you want to assign – in our case “ThreatIndicators.ReadWrite.OwnedBy” – as input. You can download it directly from here
When you execute it, you will be prompted for your Azure credentials (be sure to have the rights to change others’ users permissions) and if everything goes well this output will be displayed:
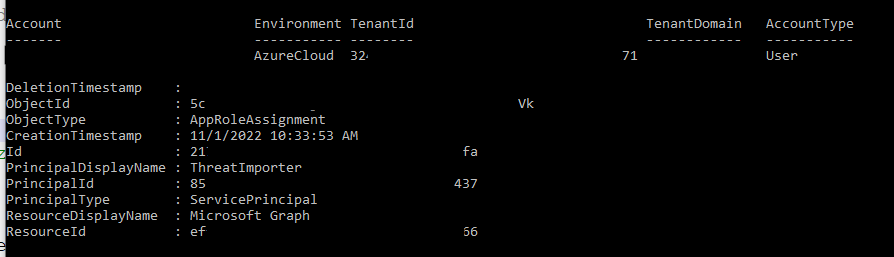
We can also verify in the Azure Portal that the changes have been applied:
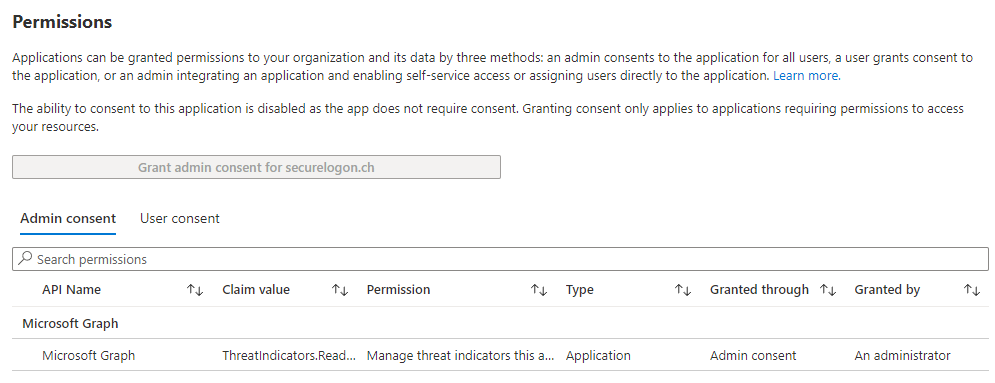
The permissions has been successfully set!
Main Workflow
Now that we finished with the basic settings let’s dive into the workflow! We will not walk through all steps, but they are available as a template on our GitHub for you to import and customize.
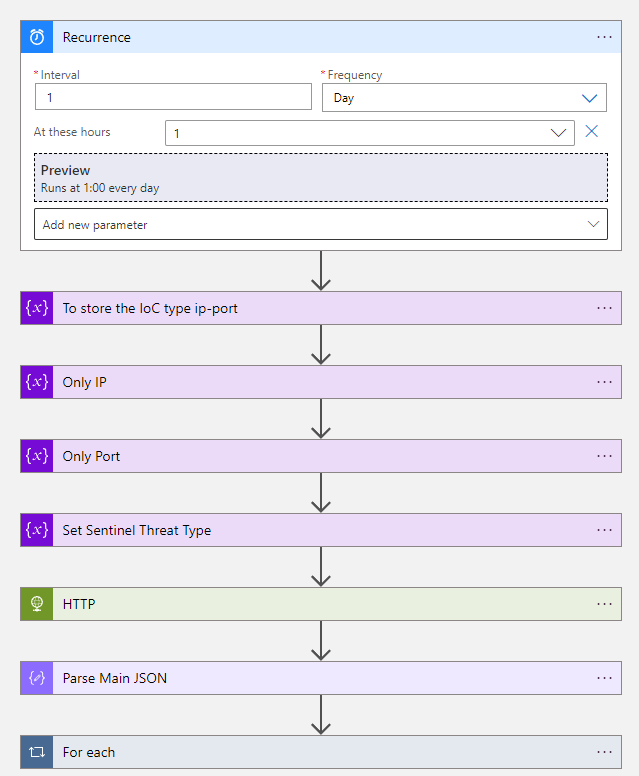
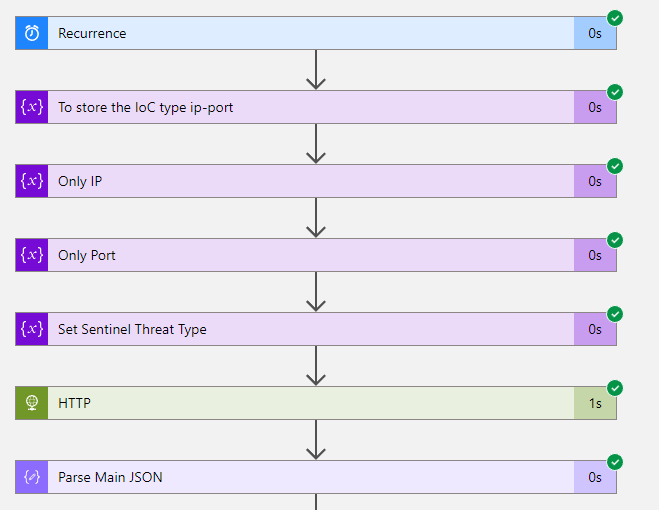
The workflow triggers every day at 01:00 AM. The following block calls the ThreatFox api:
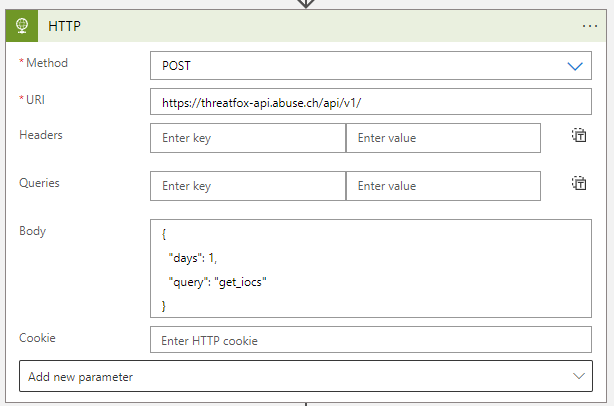
We call the https://threatfox-api.abuse.ch/api/v1 endpoint to download all IoCs of the previous day. This calls return a large JSON array that needs to be parsed:

The schema can be generated with a sample request. In the case above we adapted it to be less “strict” by passing the value “{}” for every field. This tells the schema that any value is good (empty, non-empty, array, string, …). This will also parse the fields so that we can use them later.
The most complex part is the final “For each”:
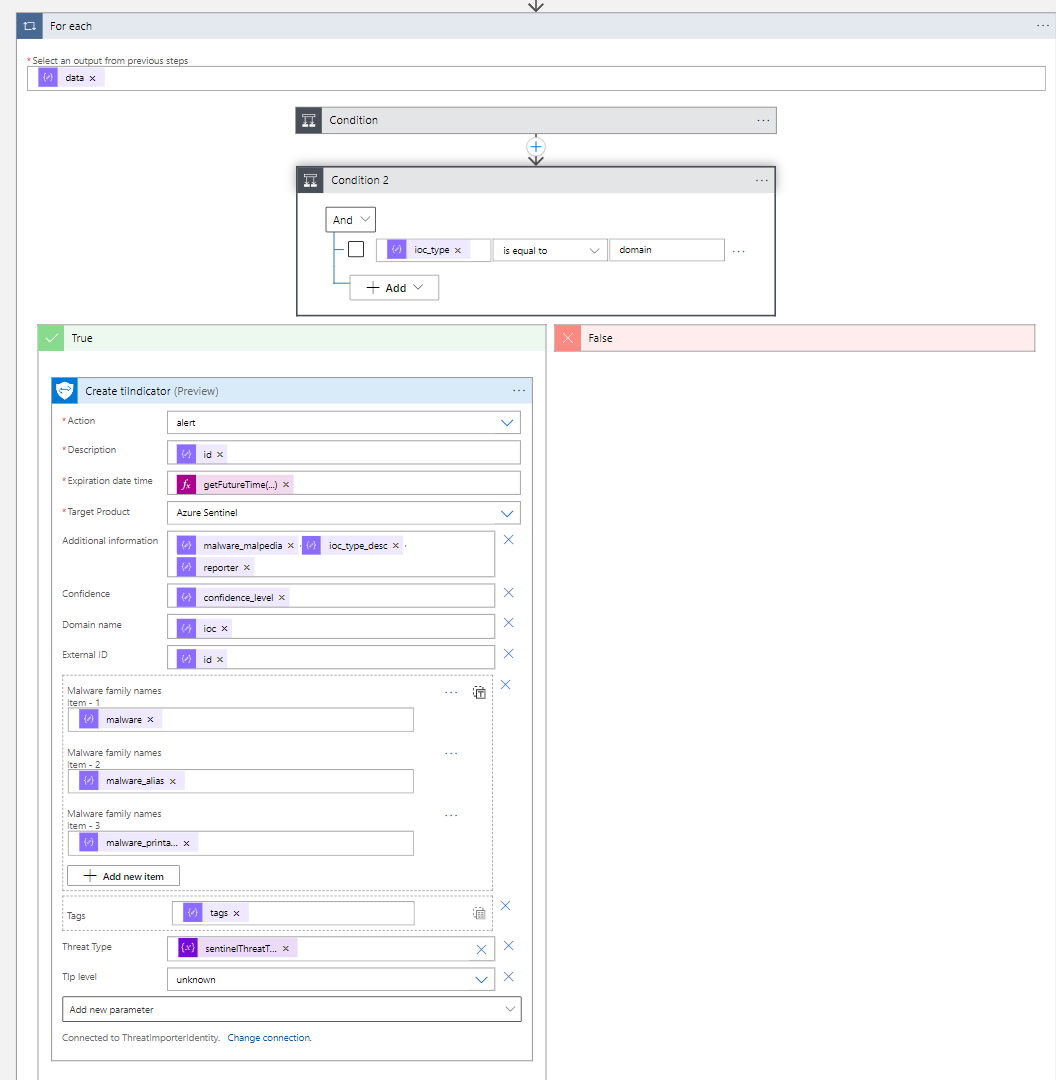
This loop for each will go through all IoCs in the array. After determining its type (domain, url, ip:port, hash) a new threat intelligence entry is created. For the sake of the simplicity we will focus only on the type “domain”:
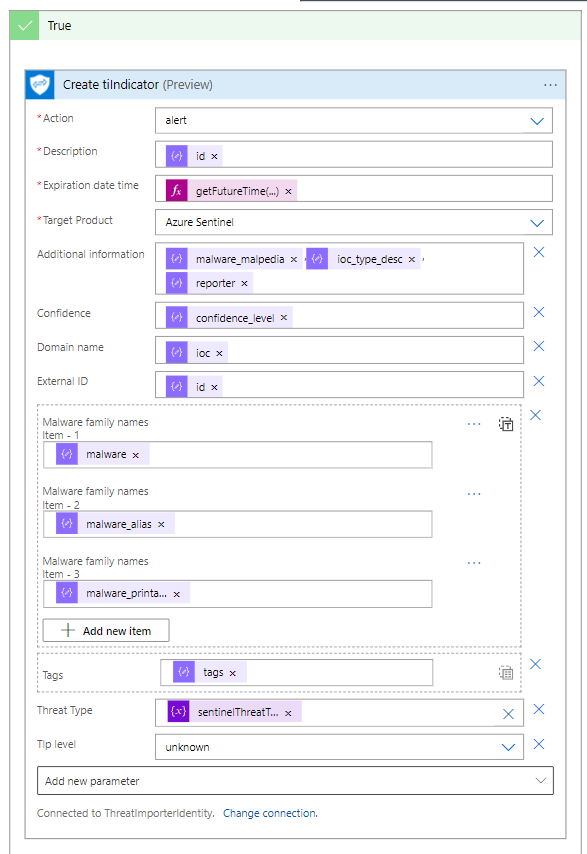
The function “Create tiIndicator” will create a valid IoC and store it into the “ThreatIntelligenceIndicator” table of Log Analytics workspace.
We pass as parameters the values of the IoC retrieved from the API (id, malware_malpedia, confidence_level, and so on). The main value (the IoC itself) is in the “ioc” variable and in the case above stored as “Domain name”.
Note that an expiration date is set in the field “Expiration date time”. For all IoC we set getFutureTime(90 days).
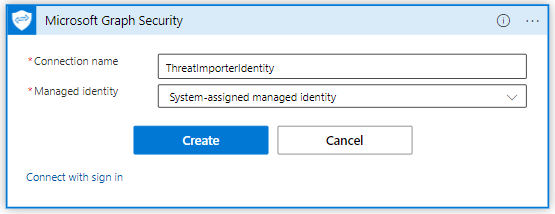
For the “Create tiIndicator” function, a connection must be specified:

This tells the app which identity must be used to connect to the service and create the data:

Select “Connect with managed identity”, give it a name and select “System-assigned managed identity” and click on “Create”:
Execution of the App
When everything is finished we can run the app the see if it works. Click on “Run Trigger” in the designer and wait until the app finishes (you can also stop it before it has gone through all IoCs if you are testing it):
The first steps ran without problems. Let’s look at one iteration of the for-each block:
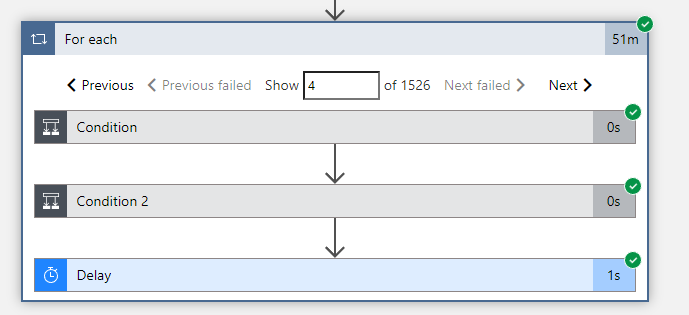
This is an example of only one IoC (you can see there are 1526) being succesfully created.
The details of this IoC are here:
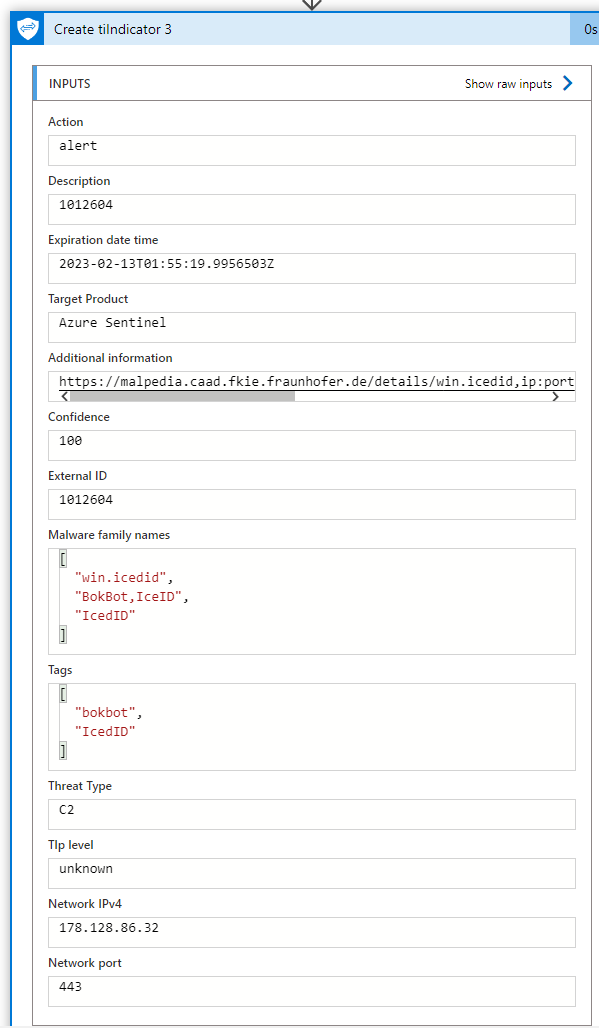
This has been identified by the conditional statement as an IoC with type “ip:port” and all the fields have been filled out. In this case, the important parts are the IPv4 (178[.]128[.]86[.]32) and the network port 443.
Verify the Results
In the Sentinel portal you can click on “Threat Intelligence” and access to the list, let’s see if the previous IoC got imported:

And here the detailed view:
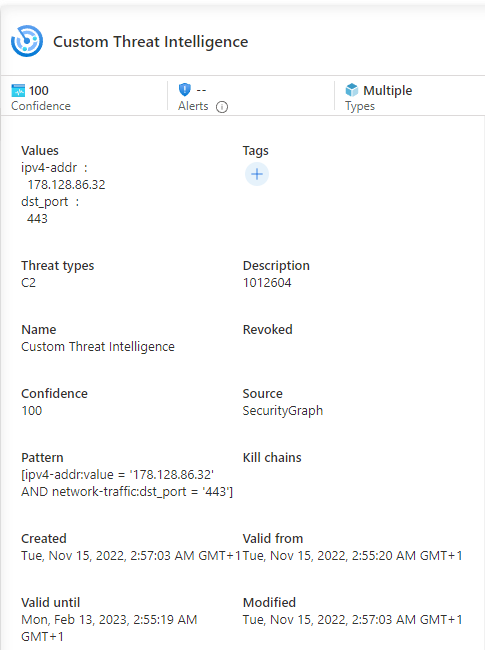
Hurra! Our IoC was imported along with thousands of others:

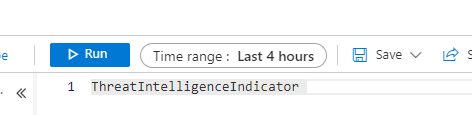
We can also query the table via Log Analytics workspace:
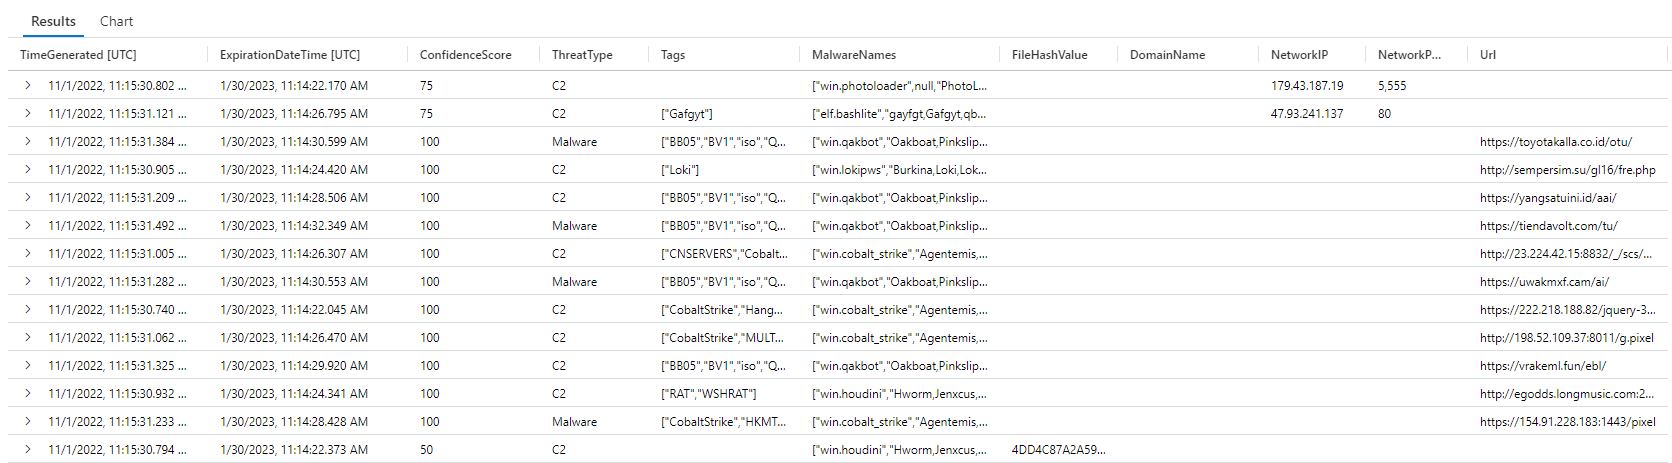
And here are the results (in the table more data is visible than in the UI):
What Now?
Now that we have IoCs, we can go to the “Analytics” menu in Sentinel and look for the rules mapping threat intelligence to a particular log. Here we just have some of them (they are already built-in):

We can for example create the rule “TI map URL entity to OfficeActivity data” to have an alert when the URL in the threat intelligence matches with some URL in the OfficeActivity:

The rule (which is already available, you do not have to code it from scratch) will look for IoC in the ThreatIntelligenceIndicator table and only extract URLs.
Customization
If you plan to use the app in your infrastructure you can modify the following parameters:
- Recurrence: change how often the app has to run
- “Create tiIndicator”: you can freely modify the values of the imported IoC and also the expiration date (in our example: 90 days)
- The for-each has as last step a “Delay” of one second. This is due to the restriction the LogicApp has when performing too many request in a certain amount of time. Change this parameter (increase it) if you want to be sure you never hit the limit.
- You can add another step to the app and send an e-mail at the end of the process, so that you will be notified of the successful run.
Problems
Performing so many request may cause problems and you could get this message:
Rate limit is exceeded. Try again in 1 seconds. Please see https://docs.microsoft.com/azure/logic-apps/handle-throttling-problems-429-errors for more details.
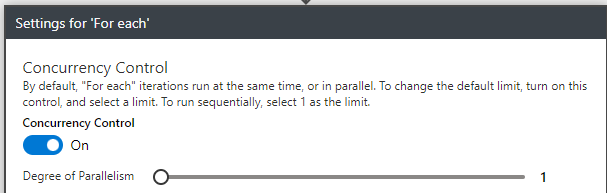
To solve this problem we changed the behavior of the for-each, by enabling parallelism and setting it to “1” so we are sure that only one iteration at a time is performed. The code for this is in the template provided but you can also set it in the LogicApp designer by clicking the three dots next to the for-each and then clicking on “Setting”:
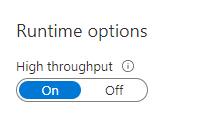
Additionally in the LogicApp menu on the left, click on “Workflow Settings” and enable the high throughput:
Conclusion
Finding good and free sources of threat intelligence is not so easy, but ThreatFox gives the community good IoCs with an easy-to-use API. This combined with the flexibility of Logic Apps and the power of Sentinel allows you to have a good and solid starting point to implement and extend the use of external threat intelligence sources in your company.
Leave a Reply